
How to Shape Model - Part 2 - Alignment / Rigid registration
Published:
In this tutorial, I’ll show you different methods to rigidly align your dataset. We will go from randomly aligned meshes to a well-aligned set of meshes from where it is much simpler to establish point-correspondence.
Video walkthrough of the blogpost:
This is the second tutorial in the series on how to create statistical shape models.

Aligning your dataset can be tedious, but the time spent here can be well worth it, as it will make it much simpler to establish point correspondence and thereby create great statistical shape models.
In this tutorial, I’ll go over 4 different methods for aligning your dataset. We will start out with two automatic methods that do not require any user input.
- Centre alignment
- The first method simply aligns a mesh to the center of the scene. This might be enough if e.g. the rotation of your meshes is already normalized.
- Principal component alignment
- The second method calculates the principal directions in your data and aligns these to the global coordinate system. This method works great when a major axis can easily be determined from the data.
- Landmark annotation
- The third method requires manually placing landmarks on all the meshes that should be aligned. This is obviously time-consuming, but at the same time, it is guaranteed to work every time.
- Rigid ICP alignment
- Finally, we will look at a fully automatic method that iteratively aligns two meshes.
Also, have a look at the official Scalismo documentation, there is also a guide on rigid alignment link.
Origin alignment is an automatic method that works well if the orientation of the meshes is similar. This could also additionally be refined with rigid ICP alignment which we will discuss briefly.
val file = new File("data/vertebrae/raw/sub-verse010_segment_20.ply")
val mesh: TriangleMesh[_3D] = MeshIO.readMesh(file).get
val origin = mesh.pointSet.points.map(_.toVector).reduce(_ + _) / mesh.pointSet.numberOfPoints
val translation = Translation3D(EuclideanVector3D(origin.x, origin.y, origin.z))
val alignedMesh = mesh.transform(translation.inverse)
If you have metadata or some domain-specific knowledge that hints about the applied rotation, translation and even scaling, you can also build up your own complete transformation by specifying each of the components. Classes exist that then apply the different transformations one after the other, as hinted by the name. In the case of TranslationAfterScalingAfterRotation3D, the rotation will be applied first, then scaling and then translation.
val translation = Translation3D(EuclideanVector3D(origin.x, origin.y, origin.z))
val rotation = Rotation3D(phi = 0, theta = 0, psi = 0, center = Point3D(0, 0, 0))
val scaling = Scaling3D(1.0)
val transformation = TranslationAfterScalingAfterRotation3D(translation, scaling, rotation)
val alignedMesh = mesh.transform(transformation)
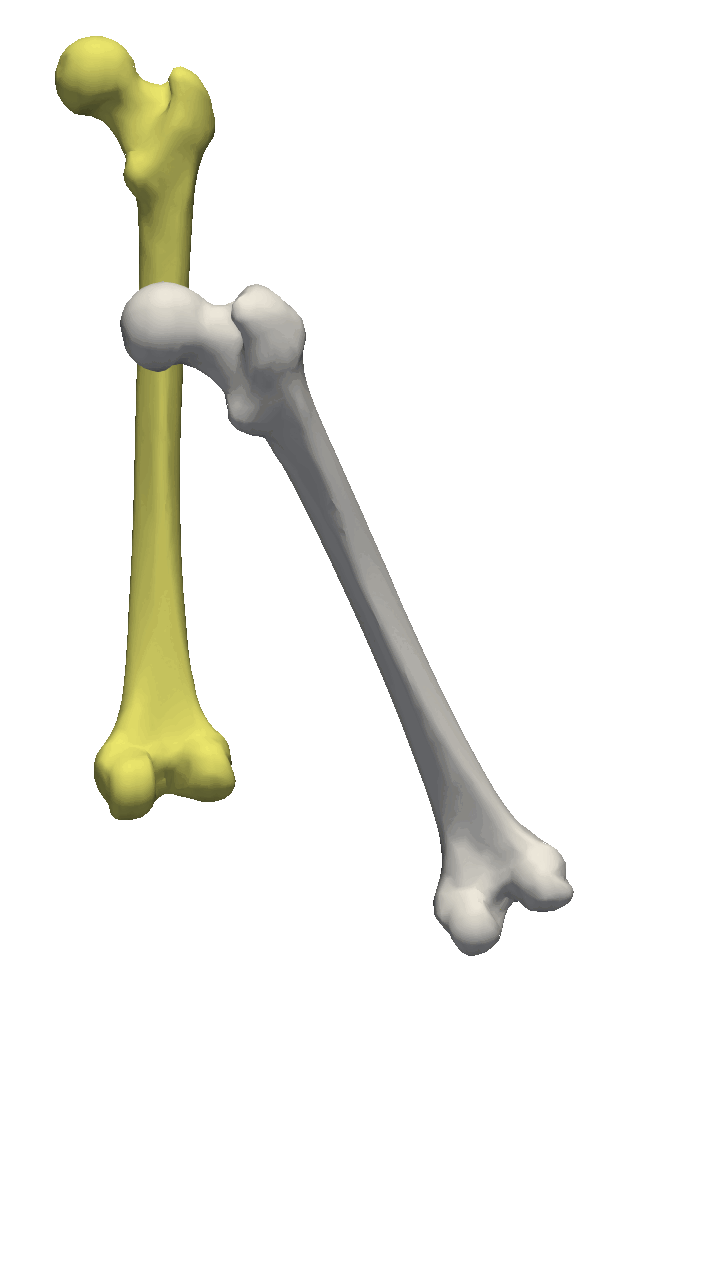
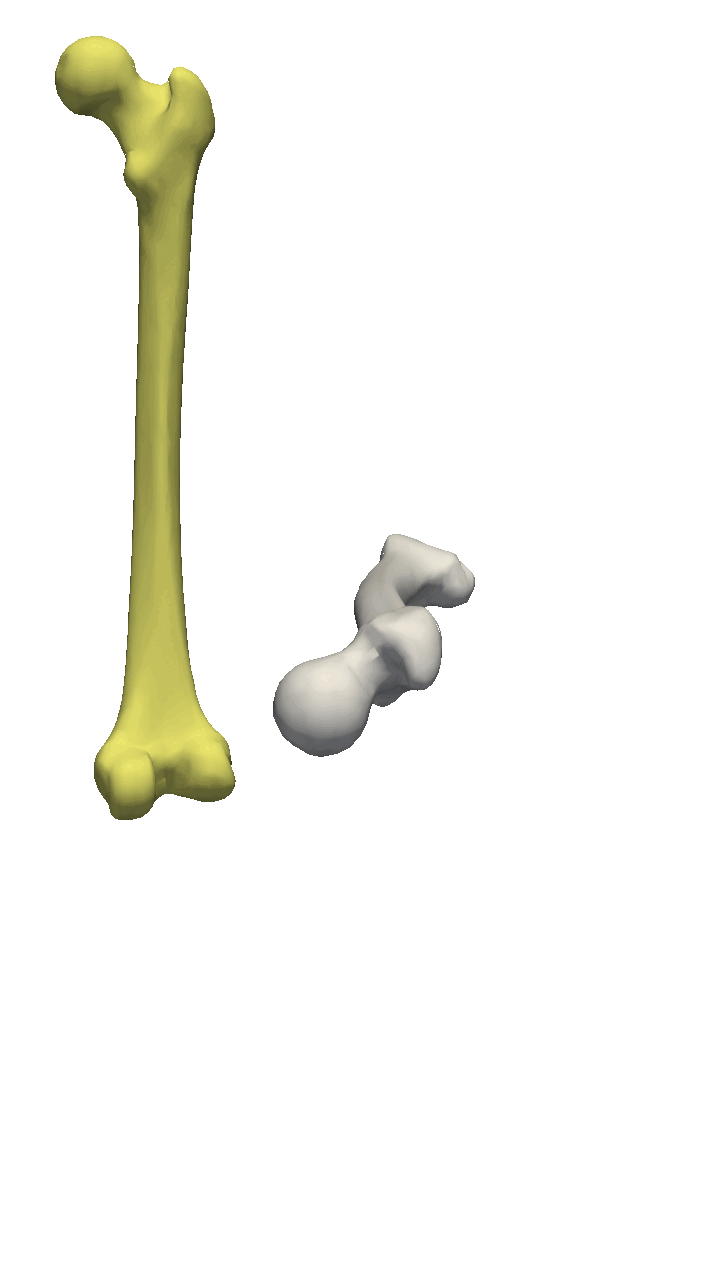
If the meshes have a major directional axis, then the PCA alignment could be useful. Note however that the axis directions might be opposites, so you will need to manually go over and rotate the meshes by 180 degrees around some of the axis. For this example, I’ll show you a few femur bones where there is a clear major axis direction.
def alignmentPrincipalAxises(mesh: TriangleMesh3D): RotationAfterTranslation[_3D] =
  val N = 1.0 / mesh.pointSet.numberOfPoints
  val center = (mesh.pointSet.points.map(_.toVector).reduce(_ + _) / mesh.pointSet.numberOfPoints).toPoint
  val cov = mesh.pointSet.points.foldLeft[SquareMatrix[_3D]](SquareMatrix.zeros)((acc, e) => acc + (e - center).outer(e - center)) * N
  val SVD(u, _, _) = breeze.linalg.svd(cov.toBreezeMatrix)
  val translation = Translation3D(center.toVector).inverse
  val rotation = Rotation3D(SquareMatrix[_3D](u.toArray), Point3D(0, 0, 0)).inverse
  RotationAfterTranslation(rotation, translation)

val translation = Translation3D(EuclideanVector3D(100,100,100))
val rotation = Rotation3D(phi = Math.PI/8, theta = Math.PI/4, psi = Math.PI/2, center = Point3D(0, 0, 0))
val transformation = TranslationAfterRotation(translation, rotation)
val targetMesh = mesh.transform(transformation)

val transformationPCA = alignmentPrincipalAxises(targetMesh)
val orientedMesh = targetMesh.transform(transformationPCA)
For the manual annotation, let’s start an instance of Scalismo-UI and load a mesh.
val ui = ScalismoUI()
Then we click the landmarking tool and start clicking landmarks. Either you can make use of the order the landmarks are defined, or as an alternative, I like to give meaningful names to the landmarks. If you have a large dataset, you can code up a semi-automatic method to help automatically change the landmarking names.
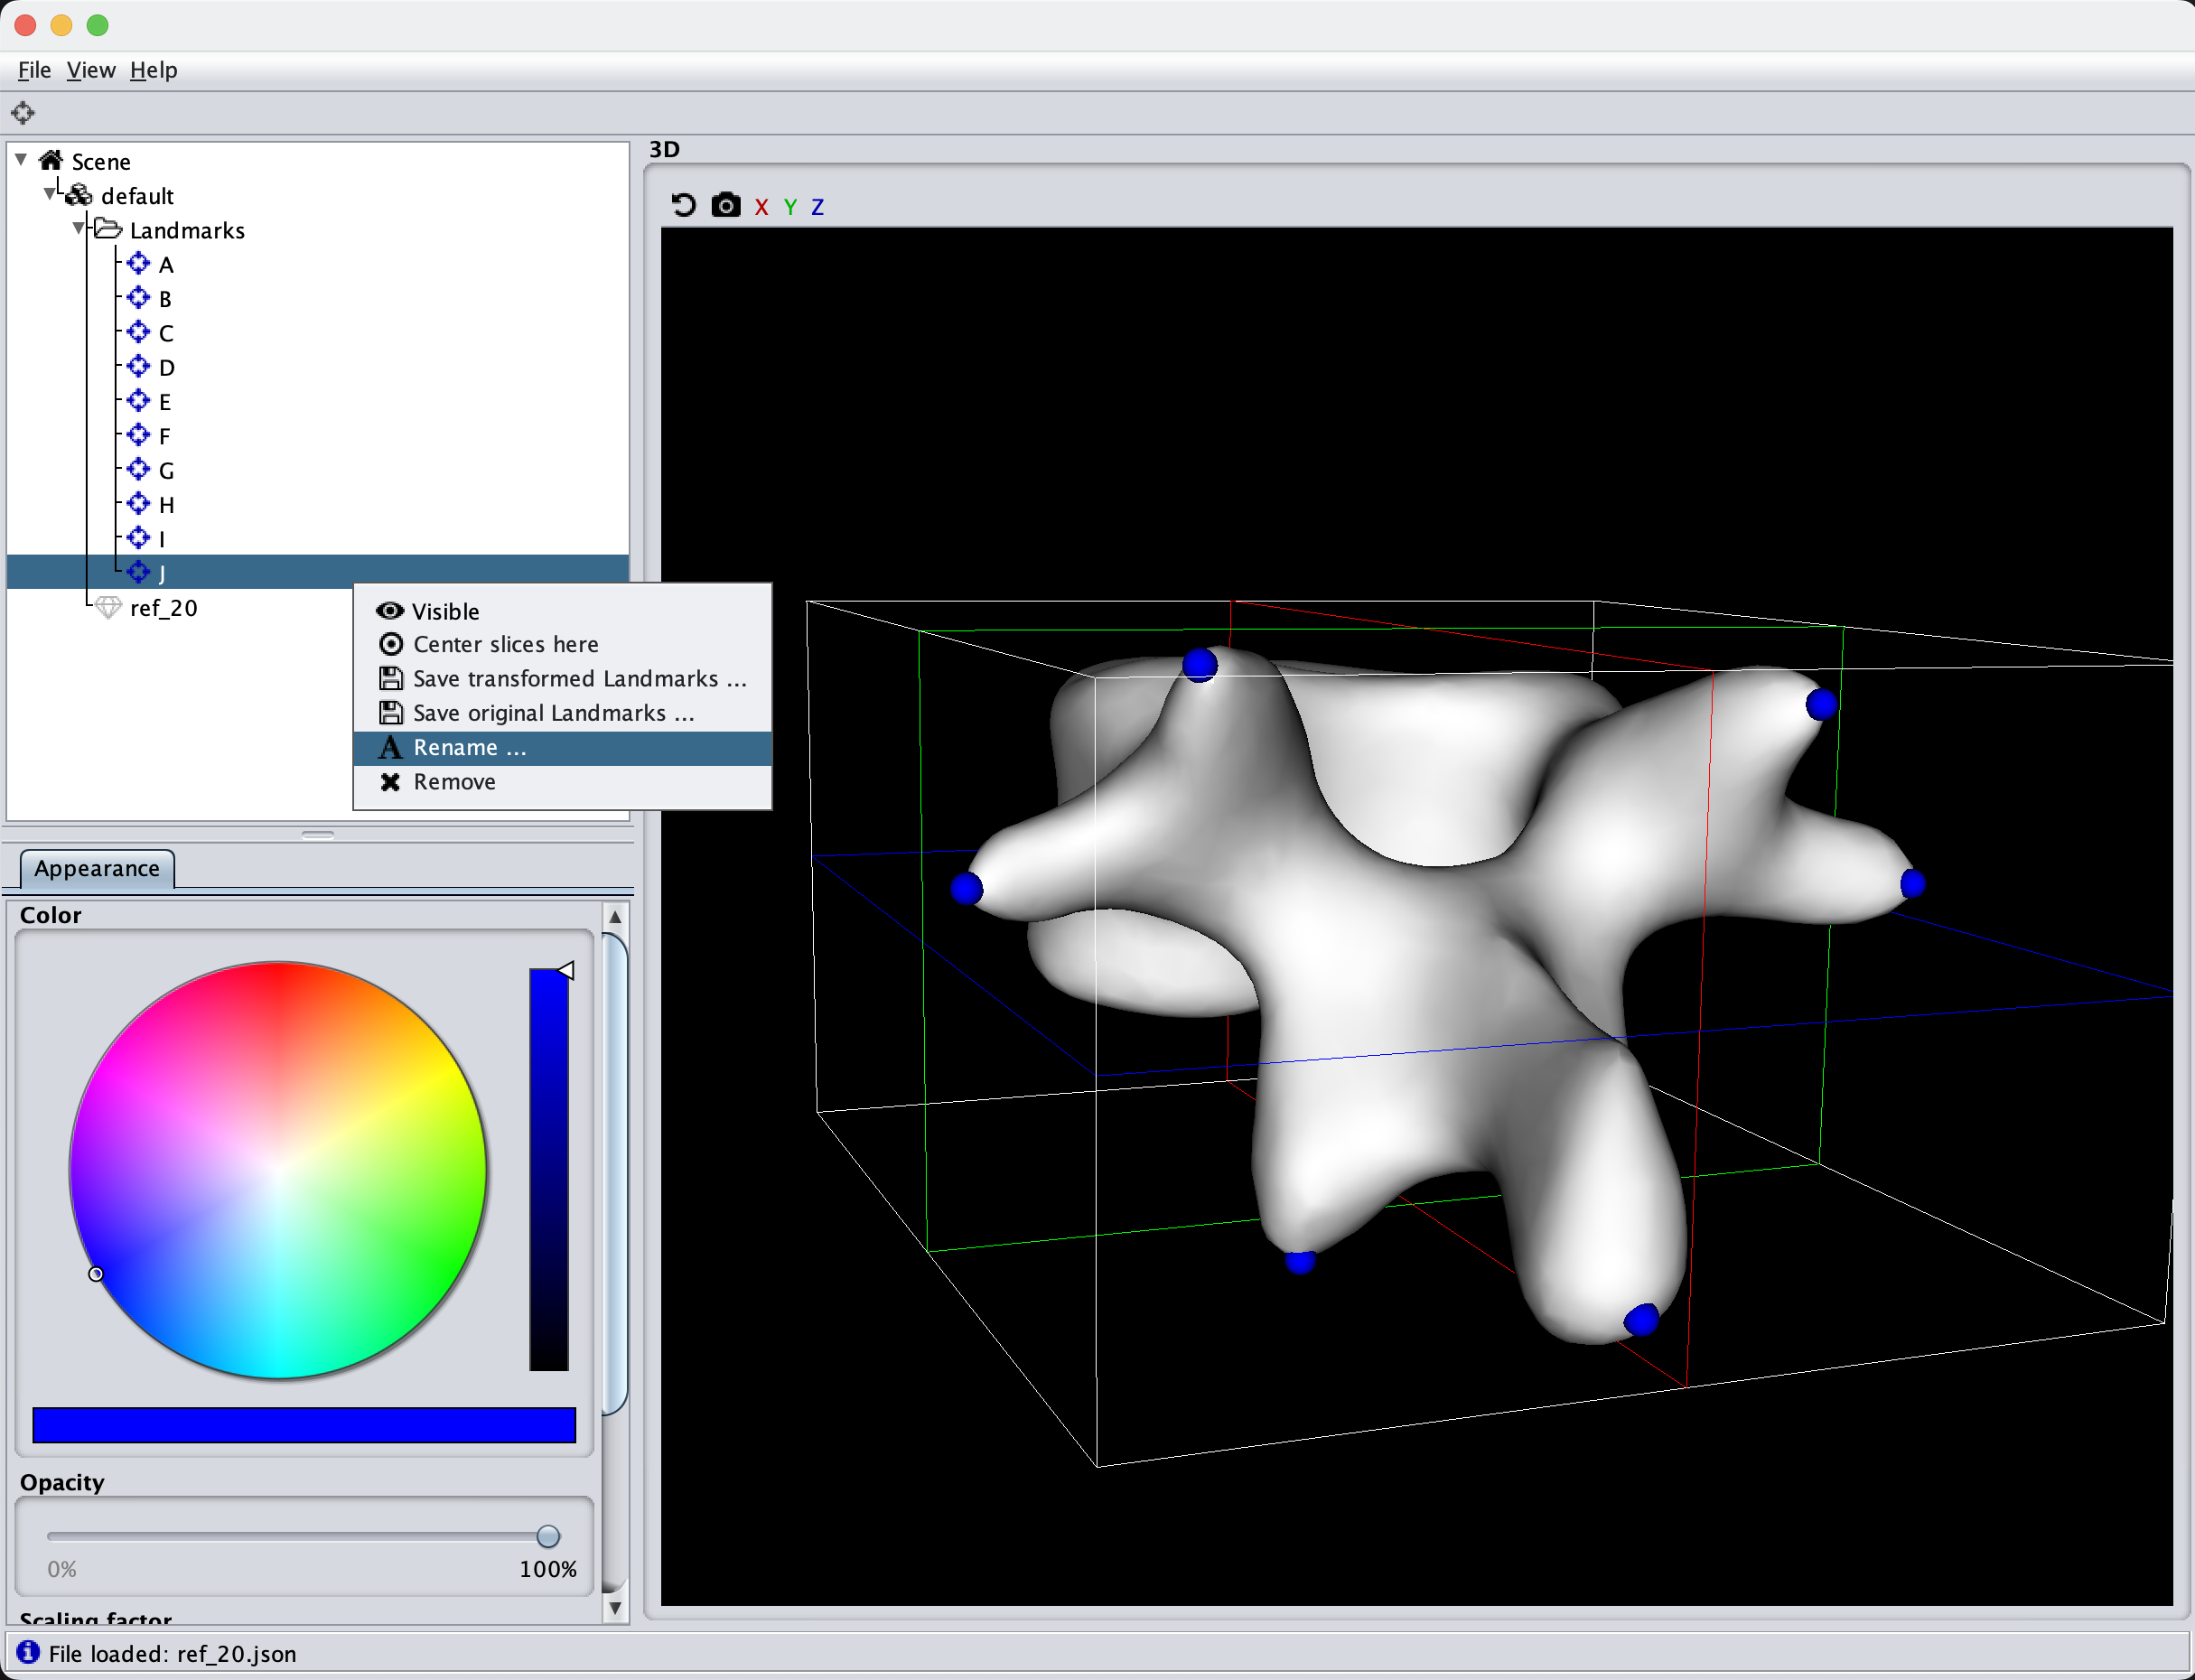
After the landmarks are clicked for each and every mesh in the dataset, it is time to align our data using Scalismo.
We first load in the reference landmarks file as these are the ones we would like to align our data to. Then we read in the target mesh and landmark file. We then calculate the transformation using the landmark transformation, apply the transformation to the mesh and the landmarks and save the mesh in a new aligned folder. Of course, feel free to overwrite the original file. Also, a good idea is to visualize the actual aligned mesh output to be sure that all your landmarks were correctly clicked.
val lms = LandmarkIO.readLandmarksJson[_3D](new File(dataDir, "ref_20.json")).get

val meshFile: File = ???
val jsonFile: File = ???
val mesh = MeshIO.readMesh(meshFile).get
val landmarks = LandmarkIO.readLandmarksJson[_3D](jsonFile).get

val transform = LandmarkRegistration.rigid3DLandmarkRegistration(landmarks, lms, Point3D(0,0,0))

val alignedMesh = mesh.transform(transform)
val alignedLms = landmarks.map(lm => lm.copy(point = transform(lm.point)))

MeshIO.writeMesh(alignedMesh, new File("alignedMesh.ply"))
LandmarkIO.writeLandmarksJson[_3D](alignedLms, new File("alignedLms.json"))
In the above example, all the landmarks are paired based on their index in the landmark files. If we instead have names of the individual landmarks, we can instead match the names in the two landmark files:
val commonLmNames = landmarks.map(_.id) intersect lms.map(_.id)

val landmarksPairs = commonLmNames.map(name => (landmarks.find(_.id == name).get.point, lms.find(_.id == name).get.point))
val transform = LandmarkRegistration.rigid3DLandmarkRegistration(landmarksPairs, Point3D(0,0,0))
Finally, let’s perform the alignment using automatic ICP alignment. This implementation is also one of the tutorials provided on the Scalismo website Scalismo Rigid ICP tutorial
def alignmentRigidICP(reference: TriangleMesh3D, target: TriangleMesh3D, numOfPoints: Int, iterations: Int): TriangleMesh3D =
  def attributeCorrespondences(movingMesh: TriangleMesh3D, ptIds : Seq[PointId]) : Seq[(Point3D, Point3D)] =
    ptIds.map((id : PointId) =>
      val pt = movingMesh.pointSet.point(id)
      val closestPointOnMesh2 = target.pointSet.findClosestPoint(pt).point
      (pt, closestPointOnMesh2)
    )

  def ICPRigidAlign(moving: TriangleMesh3D, ptIds : Seq[PointId], numberOfIterations : Int) : TriangleMesh3D =
    if (numberOfIterations == 0) then
      moving
    else
      val correspondences = attributeCorrespondences(moving, ptIds)
      val transform = LandmarkRegistration.rigid3DLandmarkRegistration(correspondences, center = Point(0, 0, 0))
      val transformed = moving.transform(transform)
      ICPRigidAlign(transformed, ptIds, numberOfIterations - 1)
  val ptIds = (0 until reference.pointSet.numberOfPoints by 50).map(i => PointId(i))
  ICPRigidAlign(reference, ptIds, iterations)
This method will iteratively estimate the corresponding points between the two meshes, calculate the transformation difference between the meshes and apply the transformation to one of the meshes. This method works well if the orientation of the meshes has already been solved. Often I use this as an additional alignment step after aligning the meshes with a few landmarks.
If one of the meshes is flipped around an axis, the method might end up in the wrong orientation.
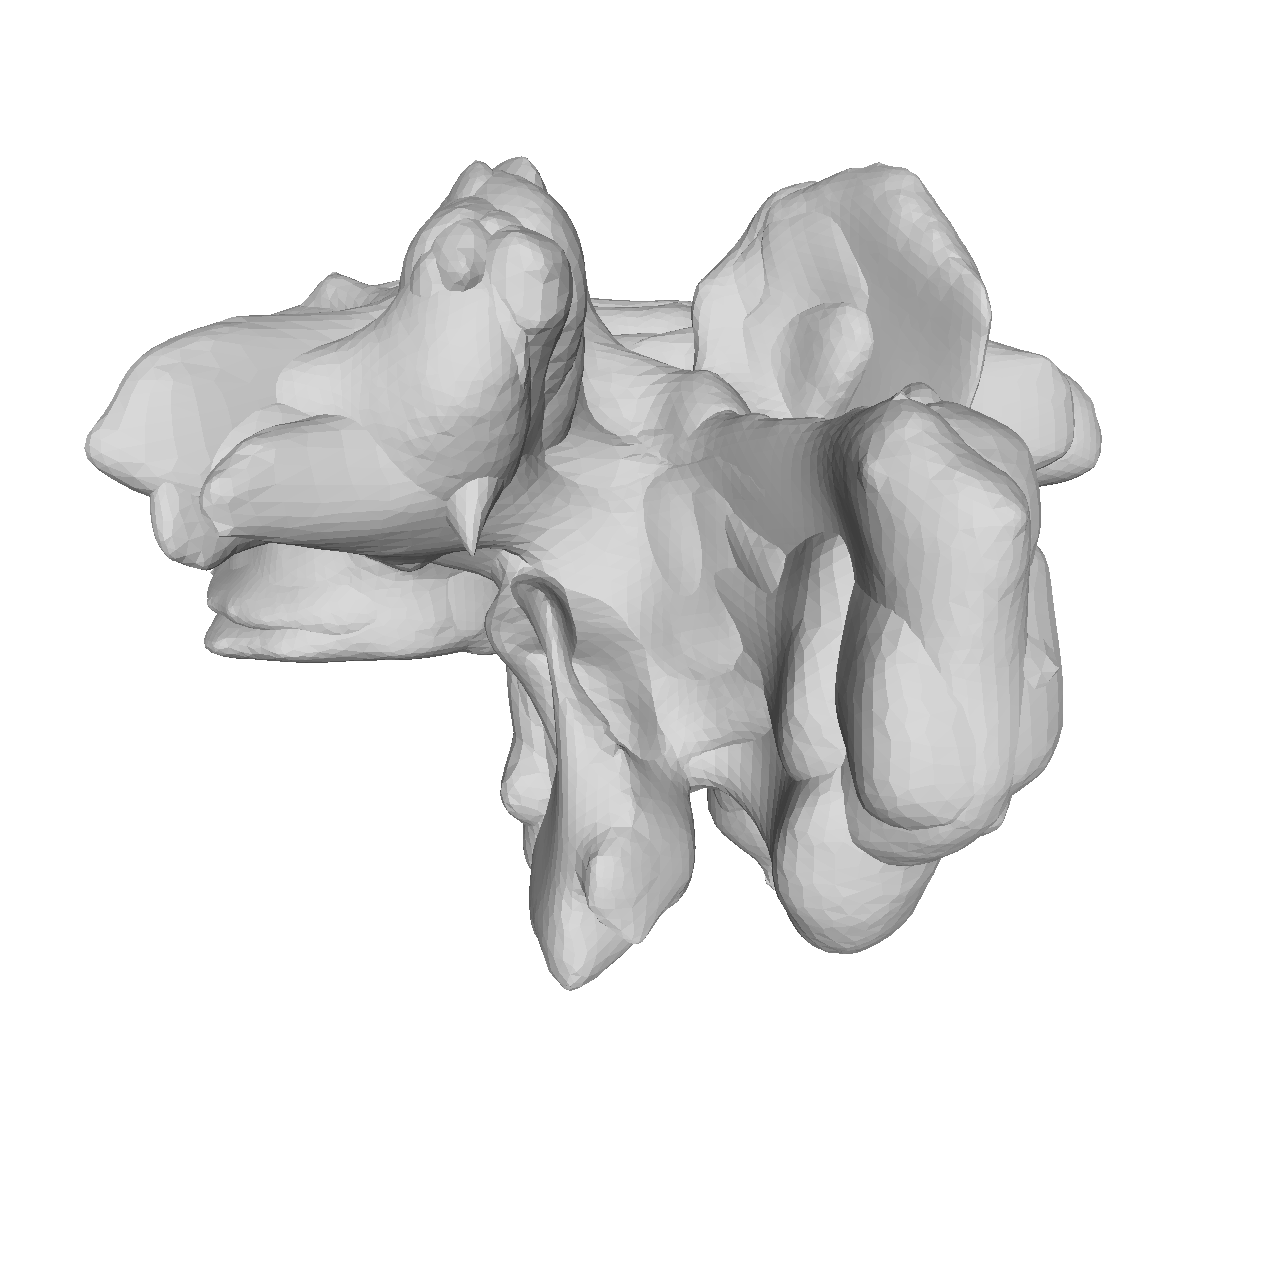
In reality, you might often end up using a mixture of the above-mentioned methods. For the vertebras, I have defined a few manually clicked landmarks as also available on the GitHub repository. Depending on the dataset you are working with, a different mixture might be more useful.
And that’s basically all there is to rigidly aligning data. Of course, a lot of more advanced methods exist out there, but for building simple statistical shape models from a relatively small set of data items, I am confident that the provided methods will take you far.
In the next tutorial:
- We will look at different strategies for choosing a reference mesh for your statistical shape model.