
How to Shape Model - Part 3 - Template design
Published:
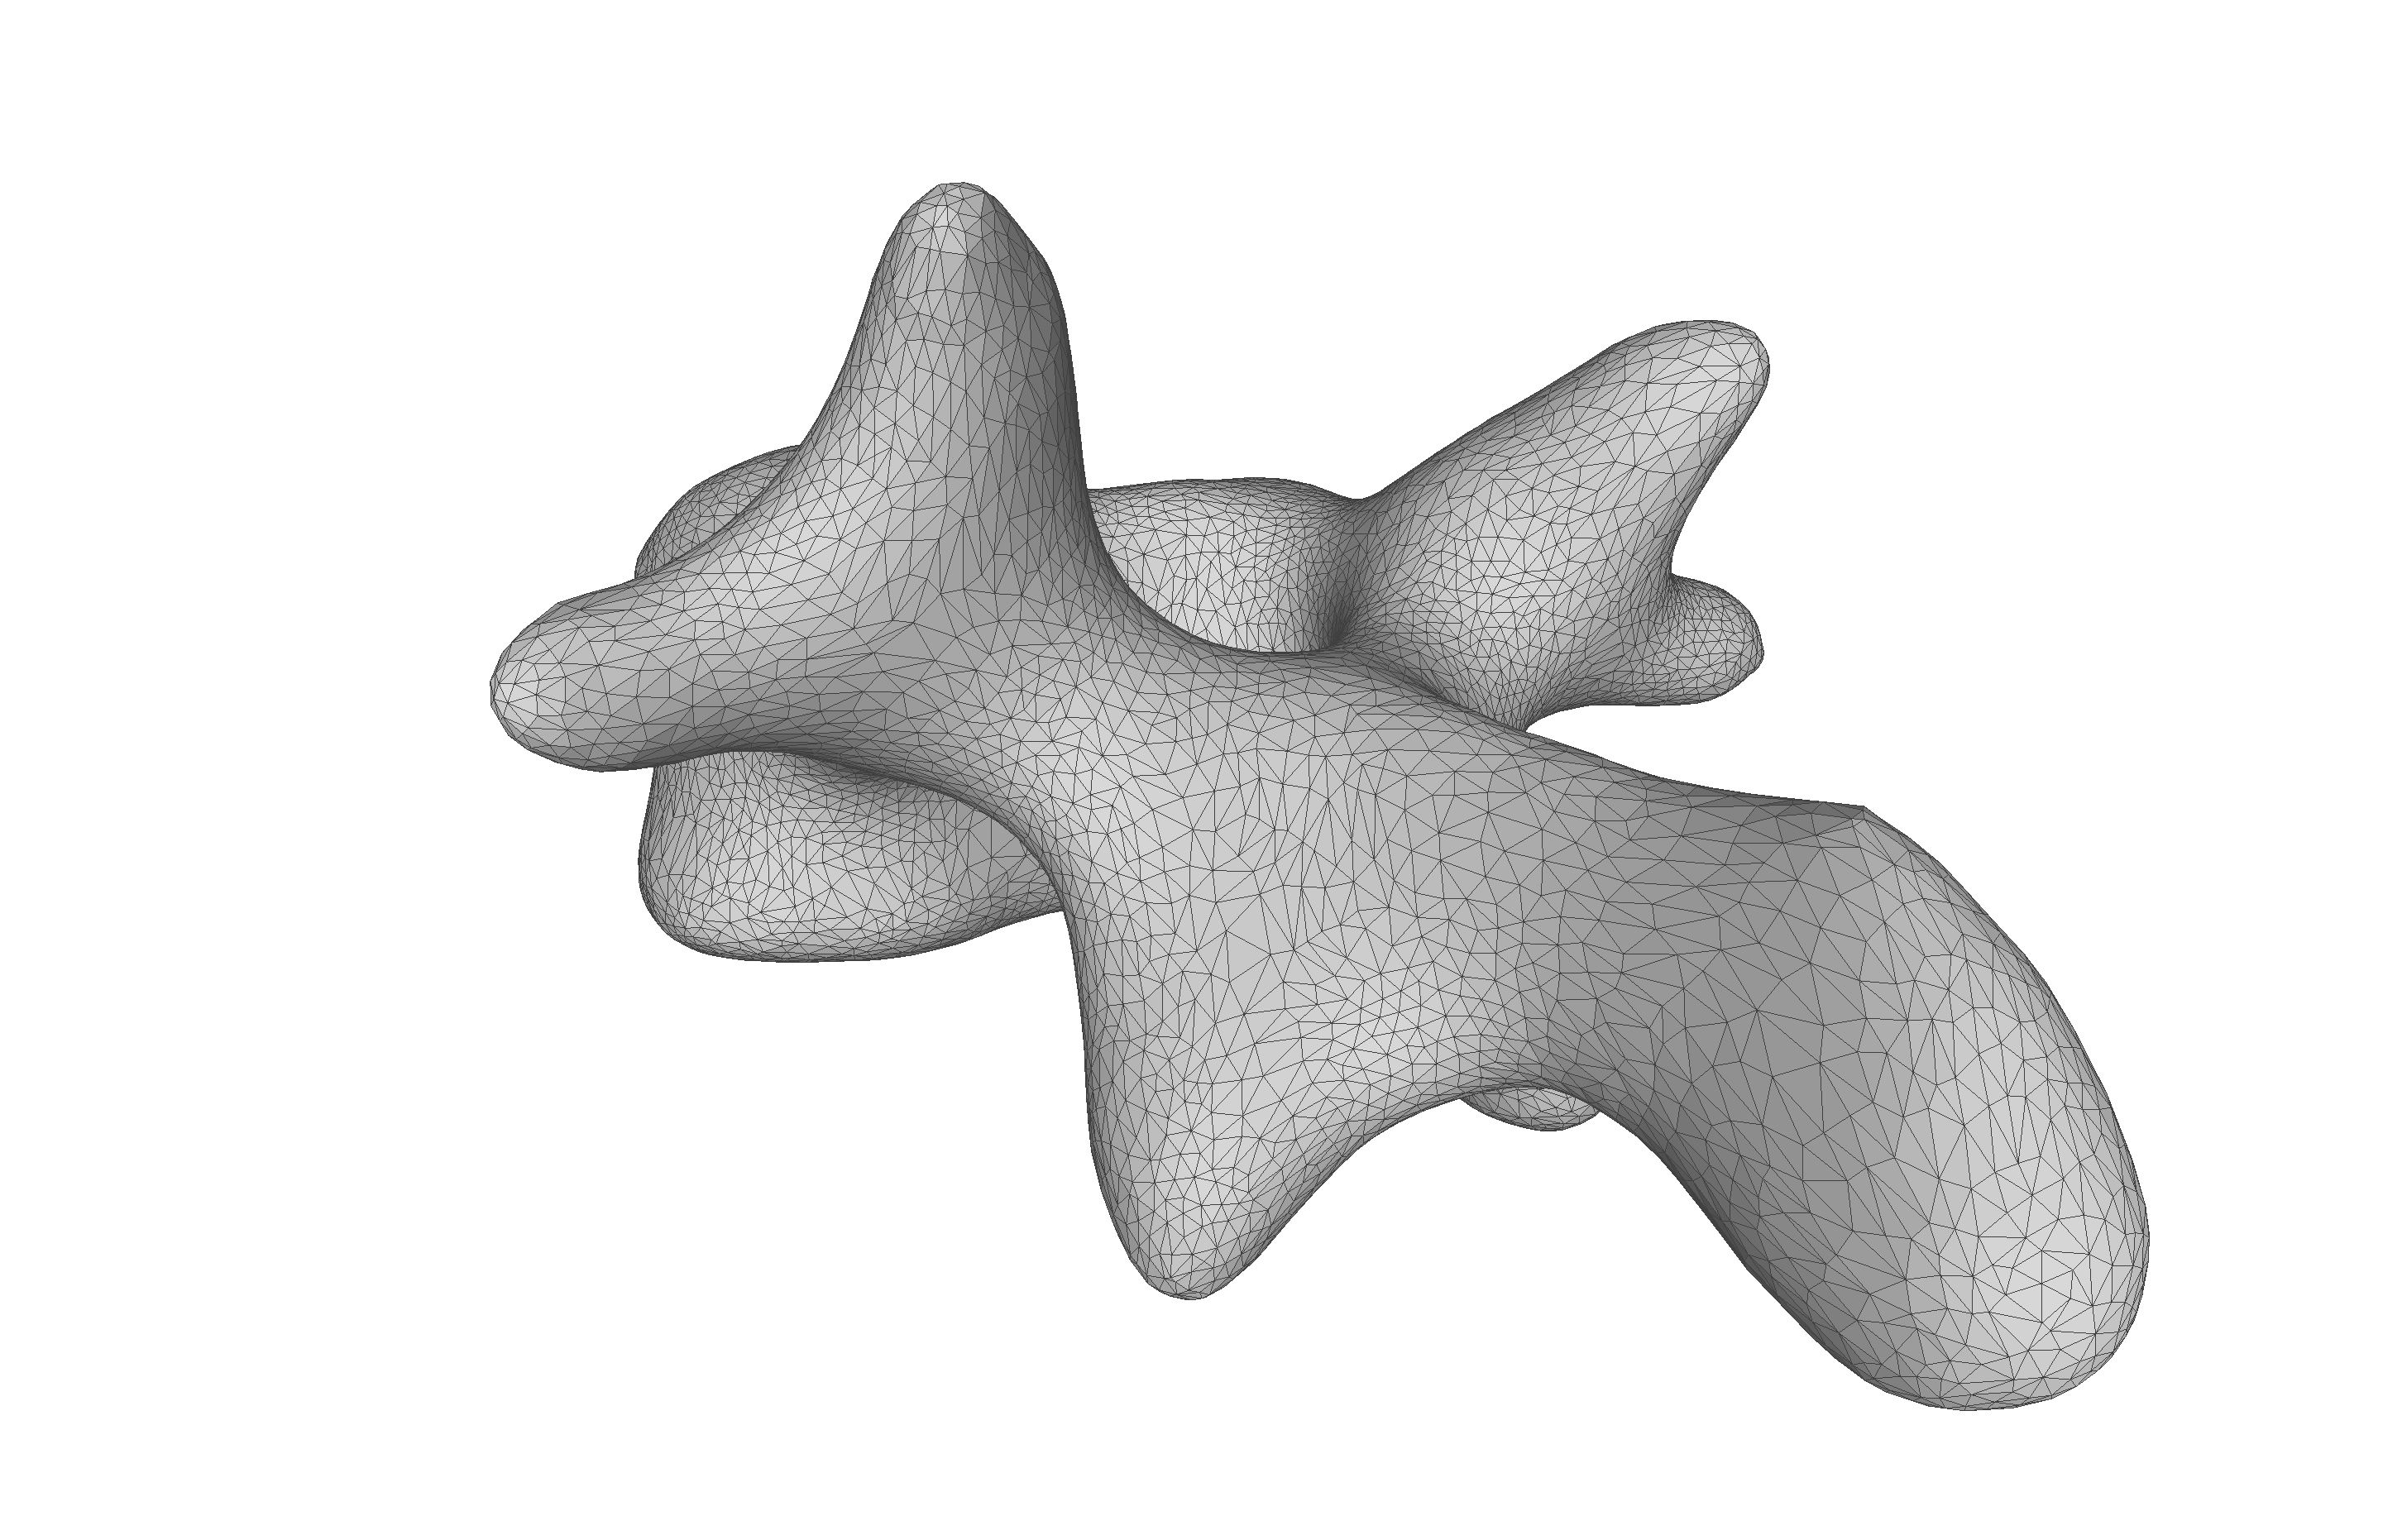
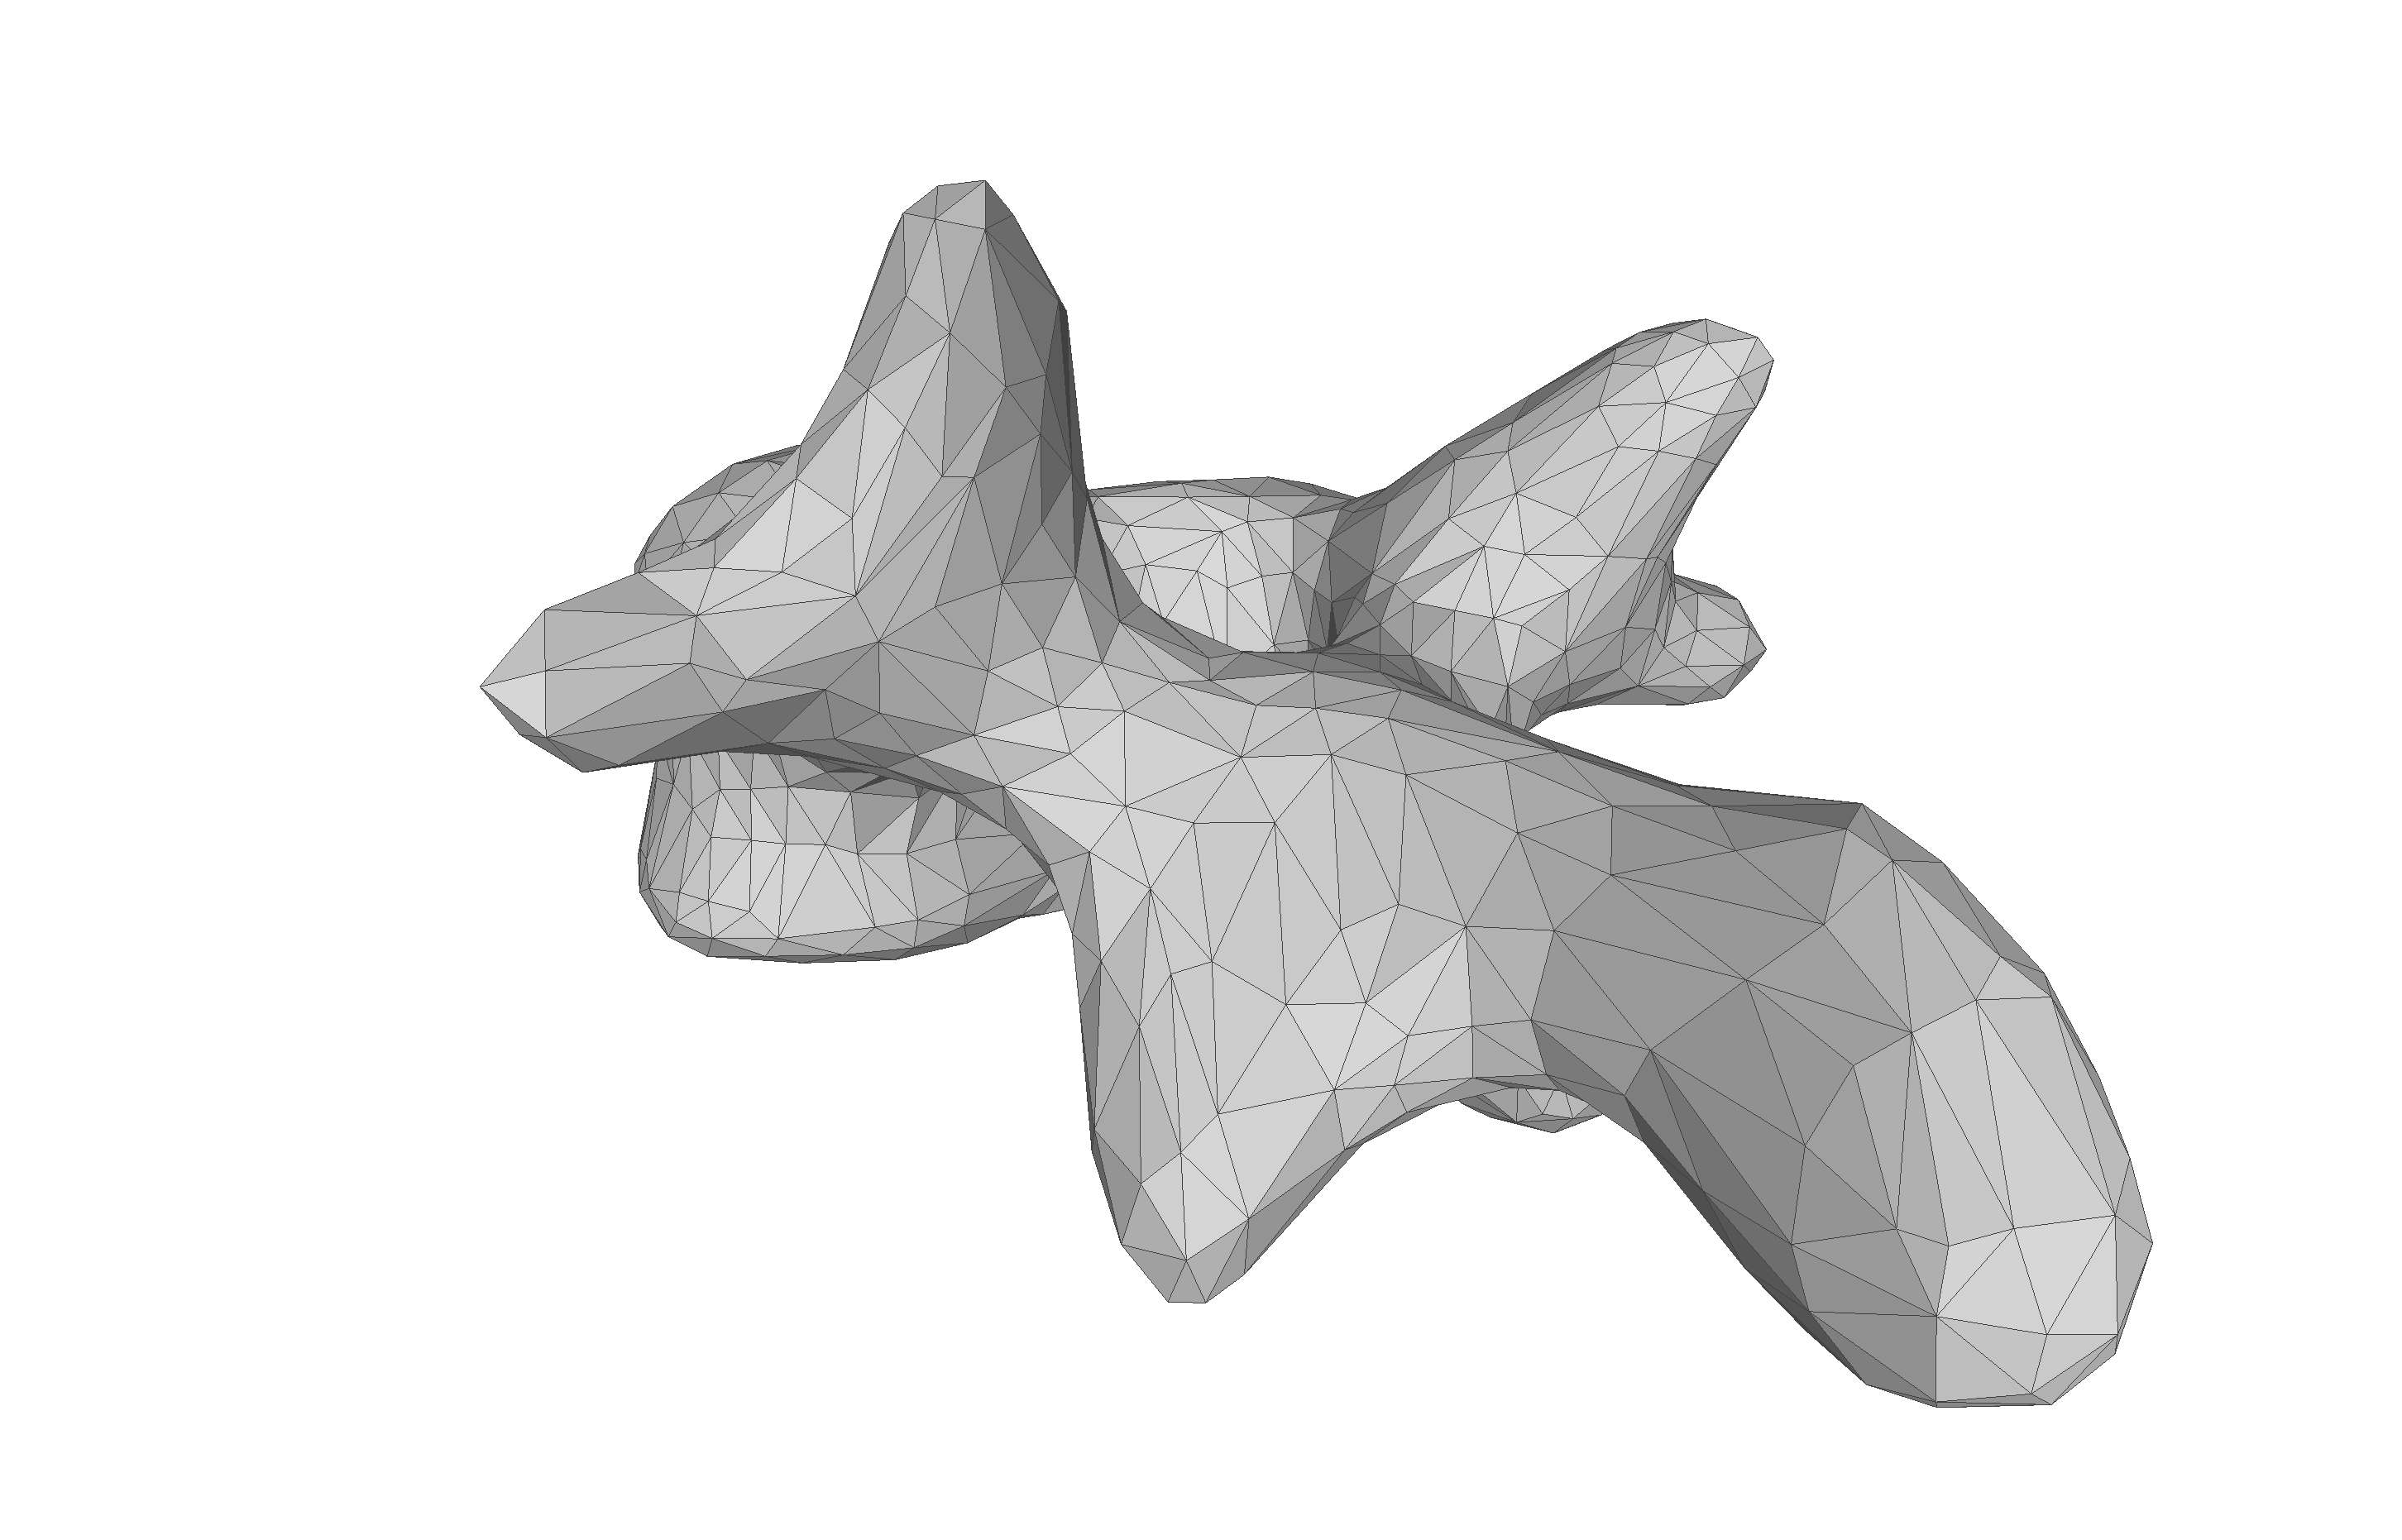
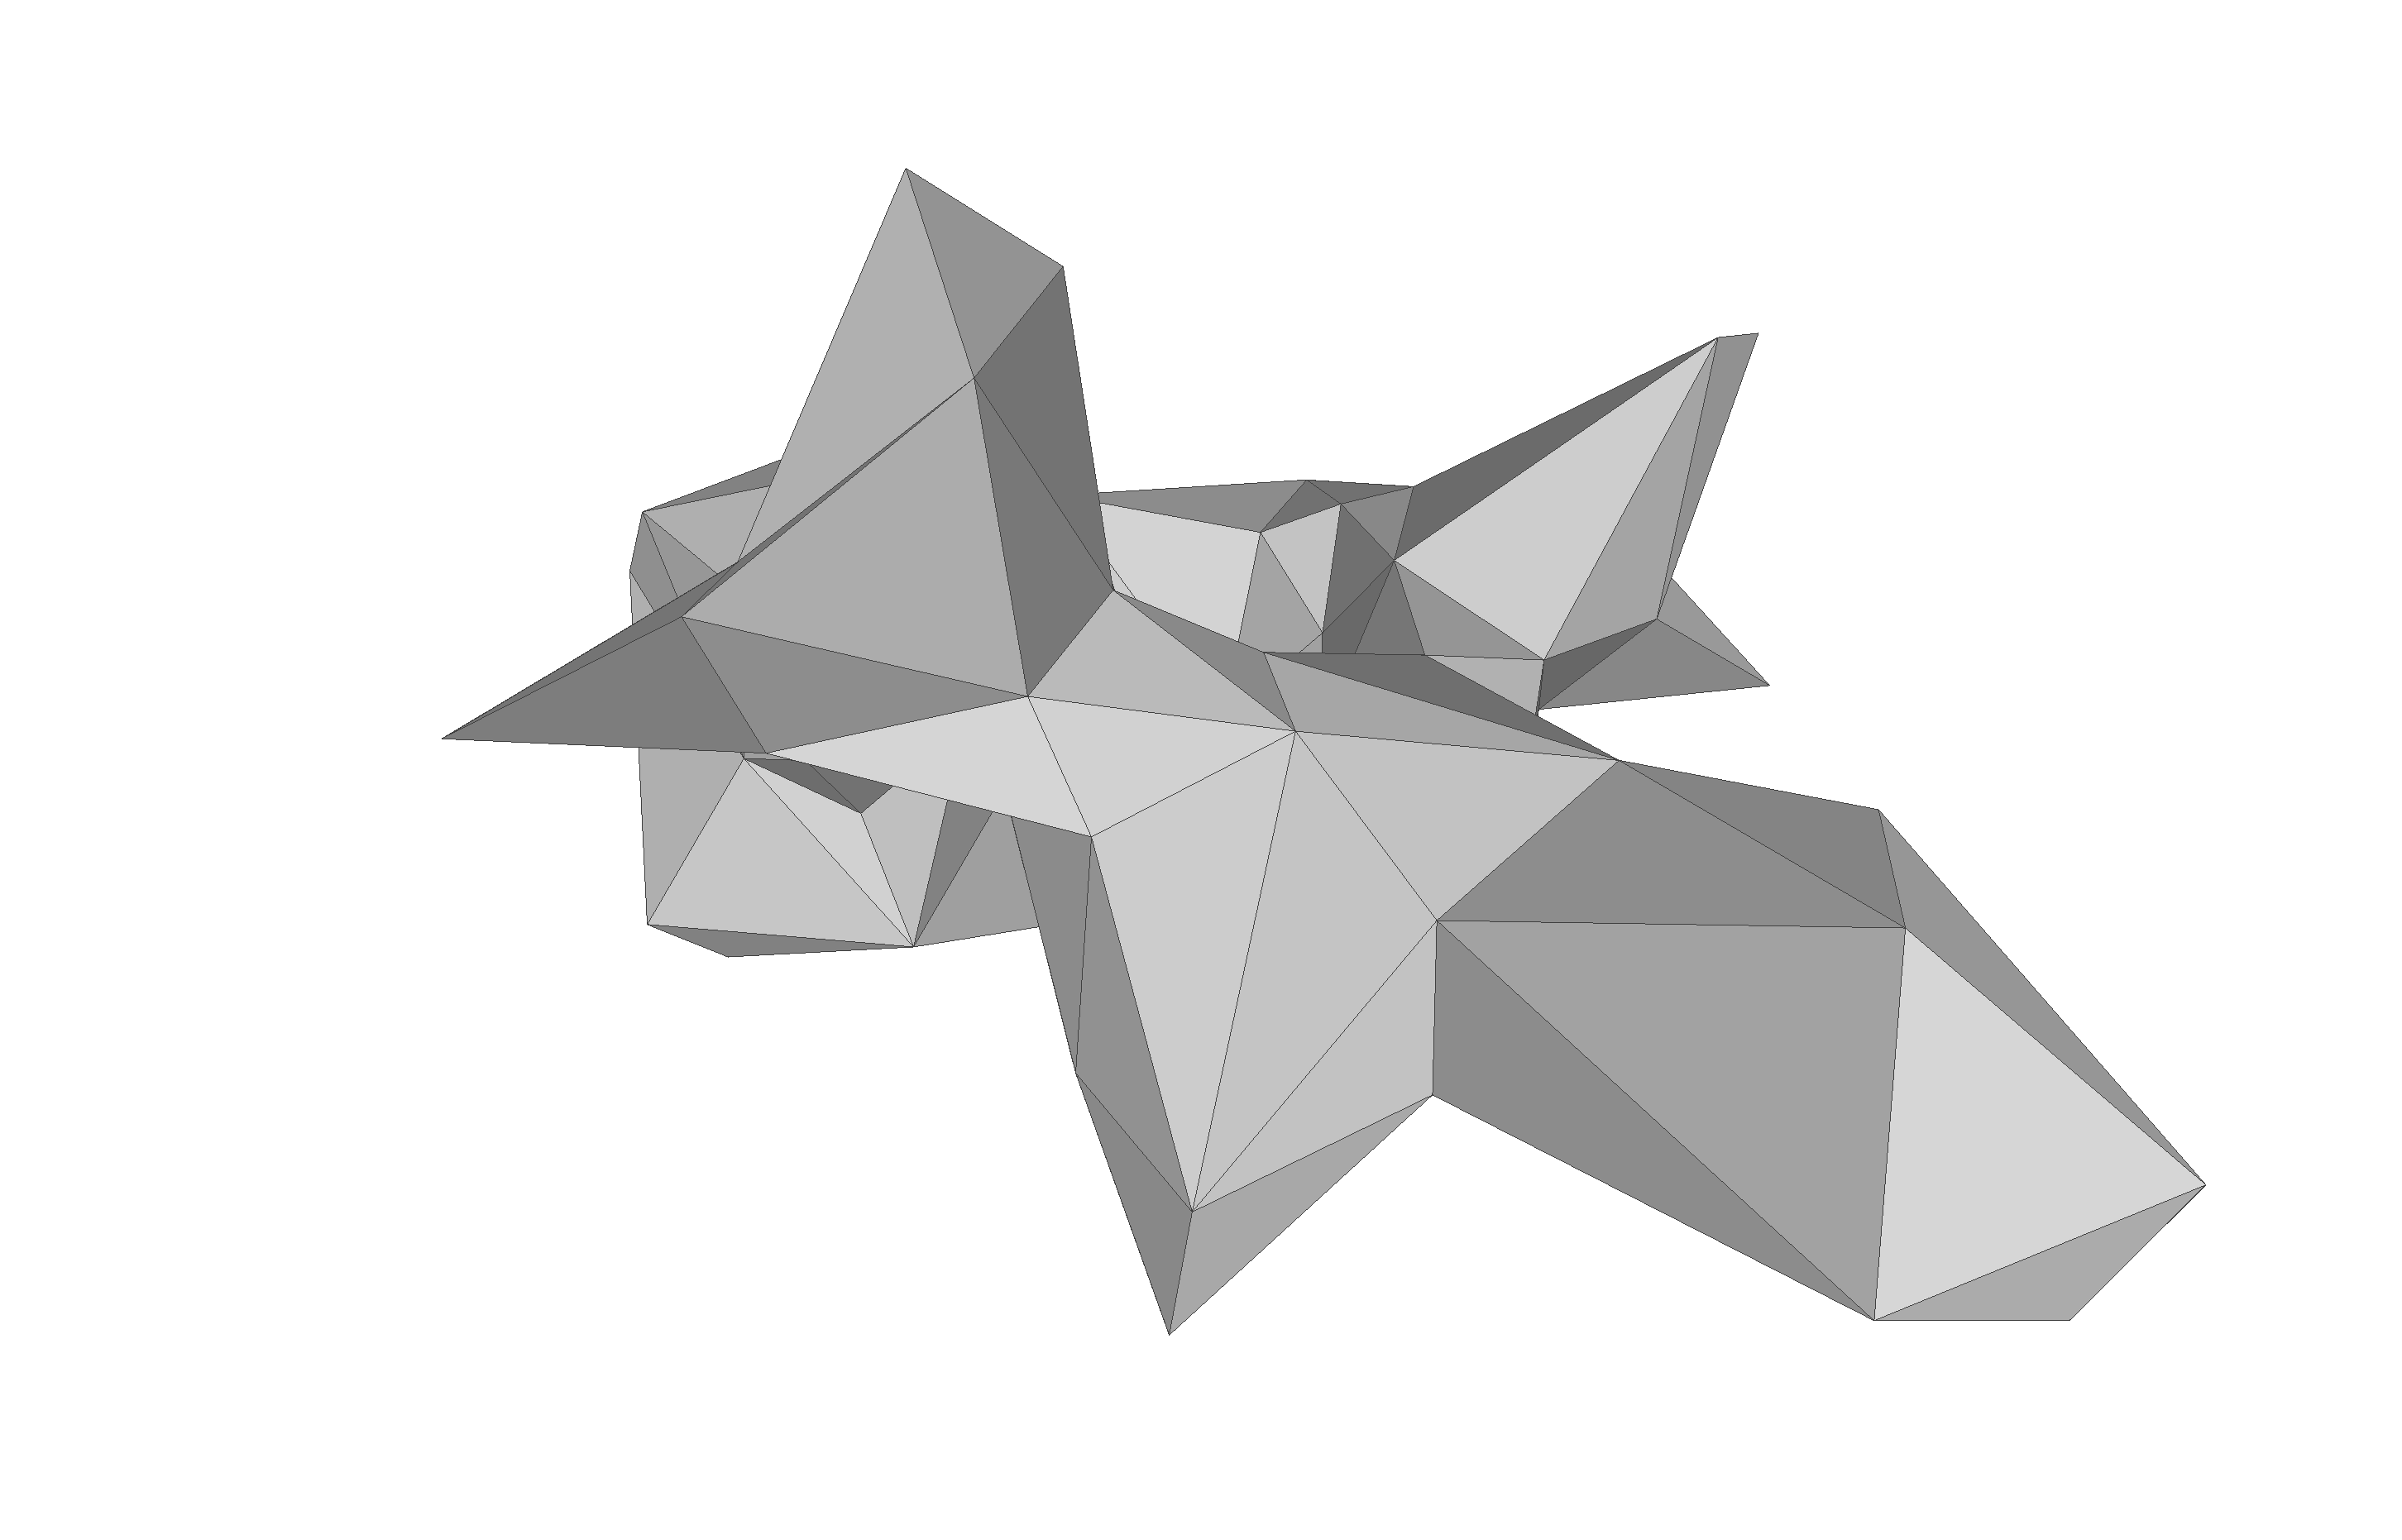
In this tutorial, I’ll show you how to design the reference shape of your shape model. We’ll go from this noisy segmented mesh to a clean and smooth mesh which will dramatically improve the usefulness of our shape model.
Video walkthrough of the blogpost:
This is the third tutorial in the series on how to create statistical shape models.
Choosing a good reference mesh is a very important step - but unfortunately also often overlooked. By mastering this step, you’ll be able to create shape models that generalize better and can be magnitudes faster and easier to use. It is very important to keep the final application of the shape model in mind when choosing a reference shape. A model used for animation in contrast to a model used for segmentation or for feature point extraction can have very different requirements.

So let’s go over the most common strategies:
- The most common strategy is to choose a random shape from the shape dataset.
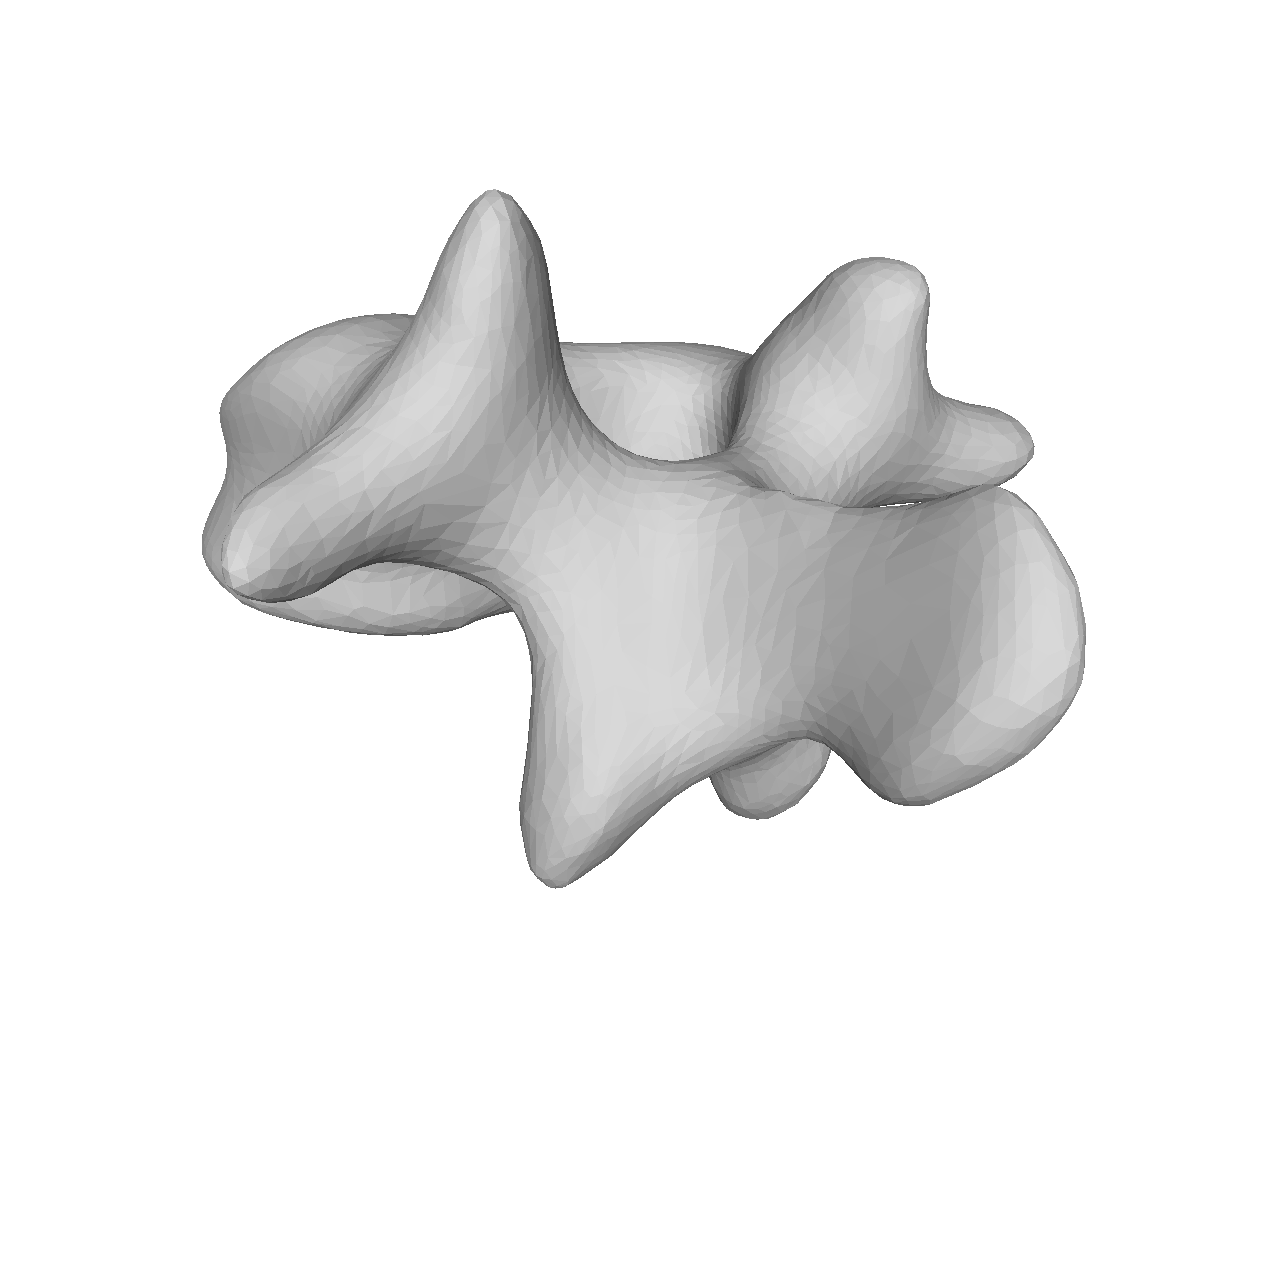
- The benefit of this is the process being FAST, but this comes at the price of potentially BAD GENERALIZATION or inheriting biases in the chosen sample to your dataset if it, for instance, has some patient-specific artifacts or biases. If we look at our extracted vertebrae meshes, we also see that they are rather noisy, this noise might stay within the model if not removed.
- Another common method is to design the reference fully manually. The benefit of this is 100% control of what the reference contains. This is popular if none of the datasets is complete, or they might all contain a certain level of biases. The Basel Face Model shown in the demo video - which I’ll link in the description - is for instance, designed by an artist, where they have increased the triangulation in areas of high detail such as the eyes, mouth and nose, whereas large surface areas are with more sparse triangulation. The negative side of this is the time needed to create such a reference as well as the expertise that is required to use 3D modeling software.
- In my opinion, the best initial option is instead to correct a random shape from the dataset manually. This will be both relatively fast and will be able to generalize well if we manage to remove the patient-specific biases. For this, we will shortly go over an example
- The fourth choice is an addition to the 3 first steps. The strategy here is to bring all the meshes in point correspondence with the chosen template and then compute the mean shape, which is what you’ll use as the new reference mesh. This step can be iterated until the mean, and the reference mesh converges to the same shape, which usually happens already after 1 or 2 iterations.
For the semi-manual reference creation, I will use two different programs, besides the Scalismo library. These are Meshlab and Meshmixer. Meshlab will be used to align the mesh and apply different simple filters to the mesh: such as smoothening, sharpening, or triangulation decimation. Meshmixer will be used for manual correction of the mesh. Oftentimes, I even go back and forth a few times between the two programs. Many more options exist out there, such as Blender, Unity, Maya and many more.
So, let’s get started and create a reference mesh. For this, I’ll choose a random mesh from the Vertebra dataset as mentioned in the introduction tutorial of the series.
The very first thing I normally do is to align the mesh to the origin and rotate it in the direction you are interested in. This can either be done with Scalismo as showed in the previous tutorial, or we can do it semi-manually in e.g. MeshLab.
I typically try out an automatic alignment first, in MeshLab, this is found under filters -> Normals, Curvature and Orientation -> Transform: Align to Principal Axis
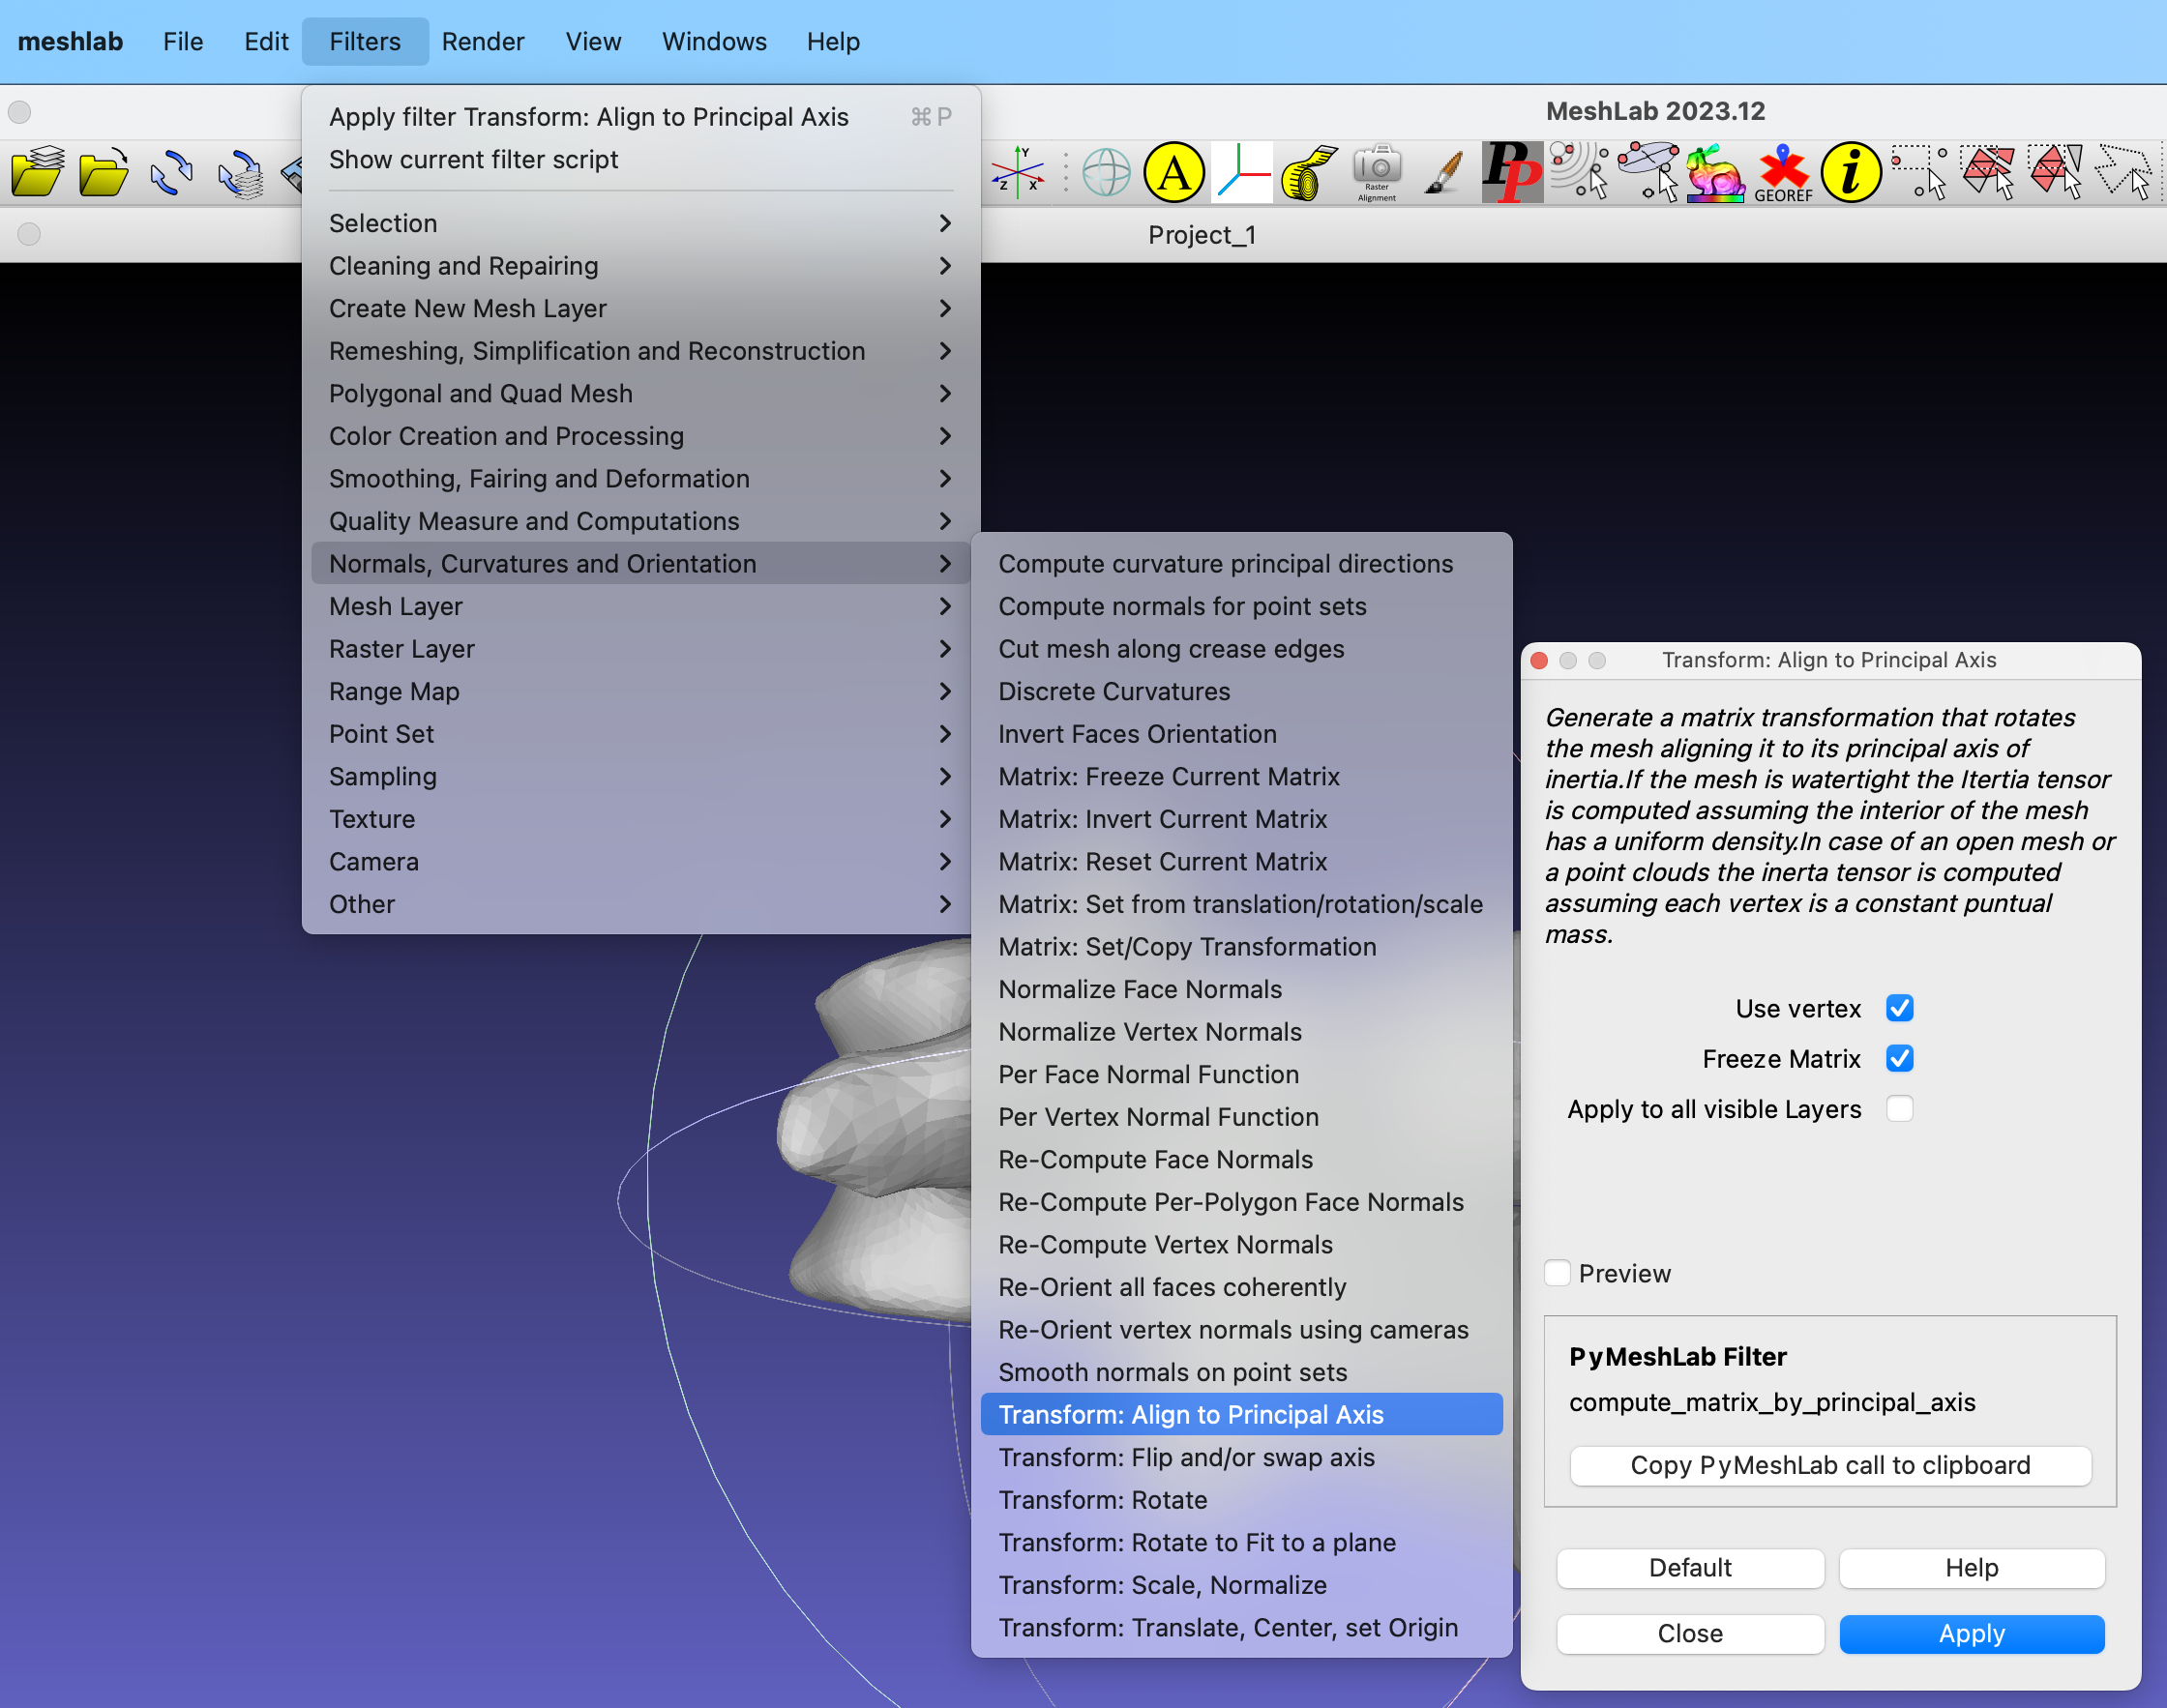
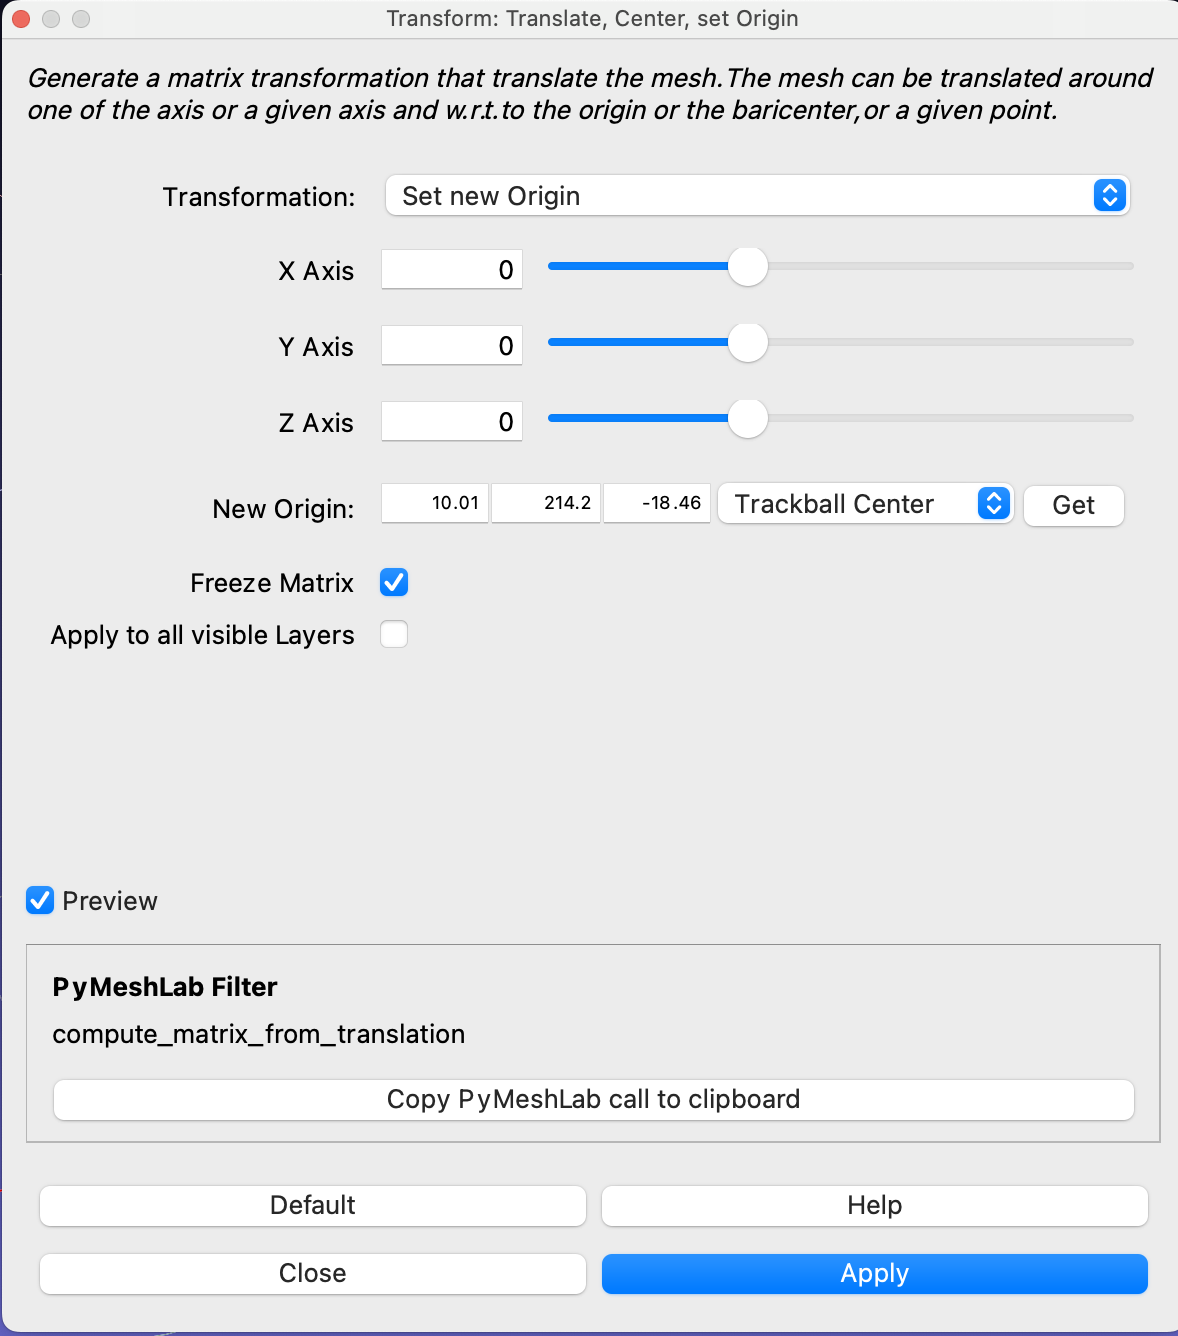
This will center the mesh and align the principal axes of the mesh to the x, y and z axes. Alternatively, the center of the mesh can be manually set with the Transform: Translate, Center, set Origin module.
Likewise, if the rotation of the mesh is not as you want, each individual axis rotation can be specified with the rotation transform Transform: Rotate.
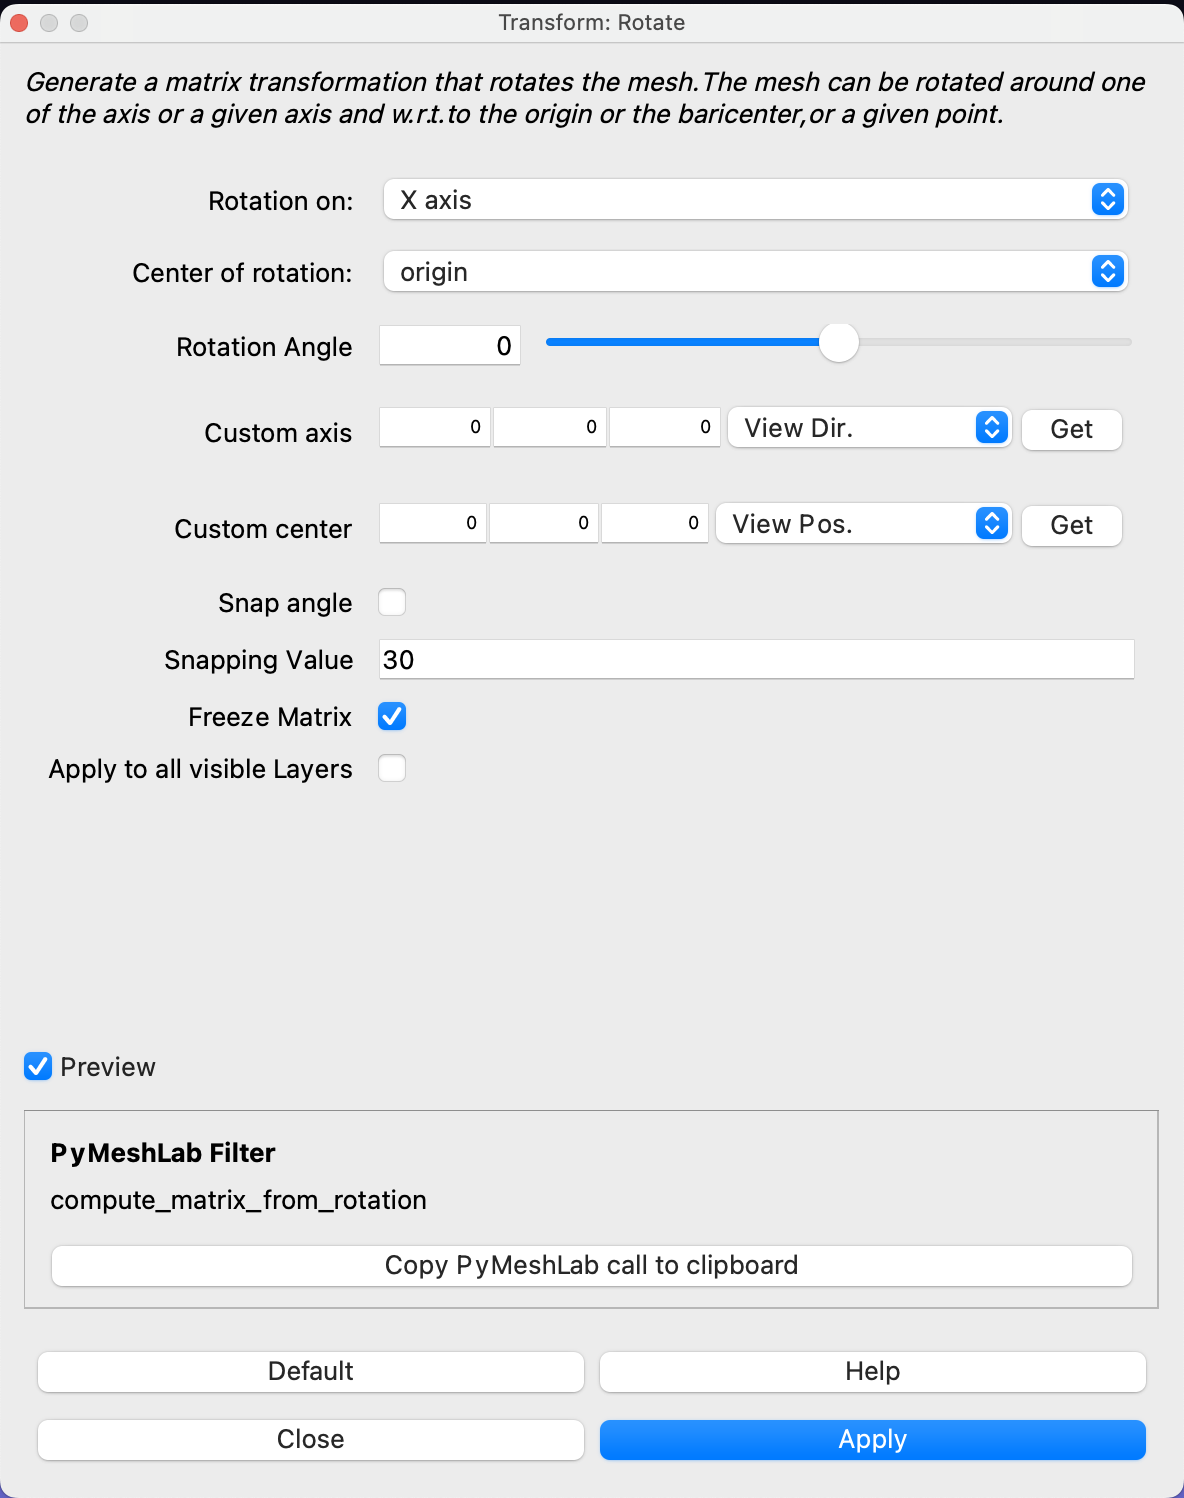
Aligning the reference is not strictly necessary, but it will make it much easier to e.g. specify region-specific kernels which we’ll see in one of the following tutorials.
Next up, we will inspect the mesh in Meshmixer. Now it is all a matter of using the different sculpt tools to clean up our mesh - or using the select tool to select items that we do not want in the reference. If the triangulation is very coarse, I usually start out applying the refinement method to the mesh and thereafter either draw, flatten, drag, move or use one of the smoothening tools to clean up the mesh.
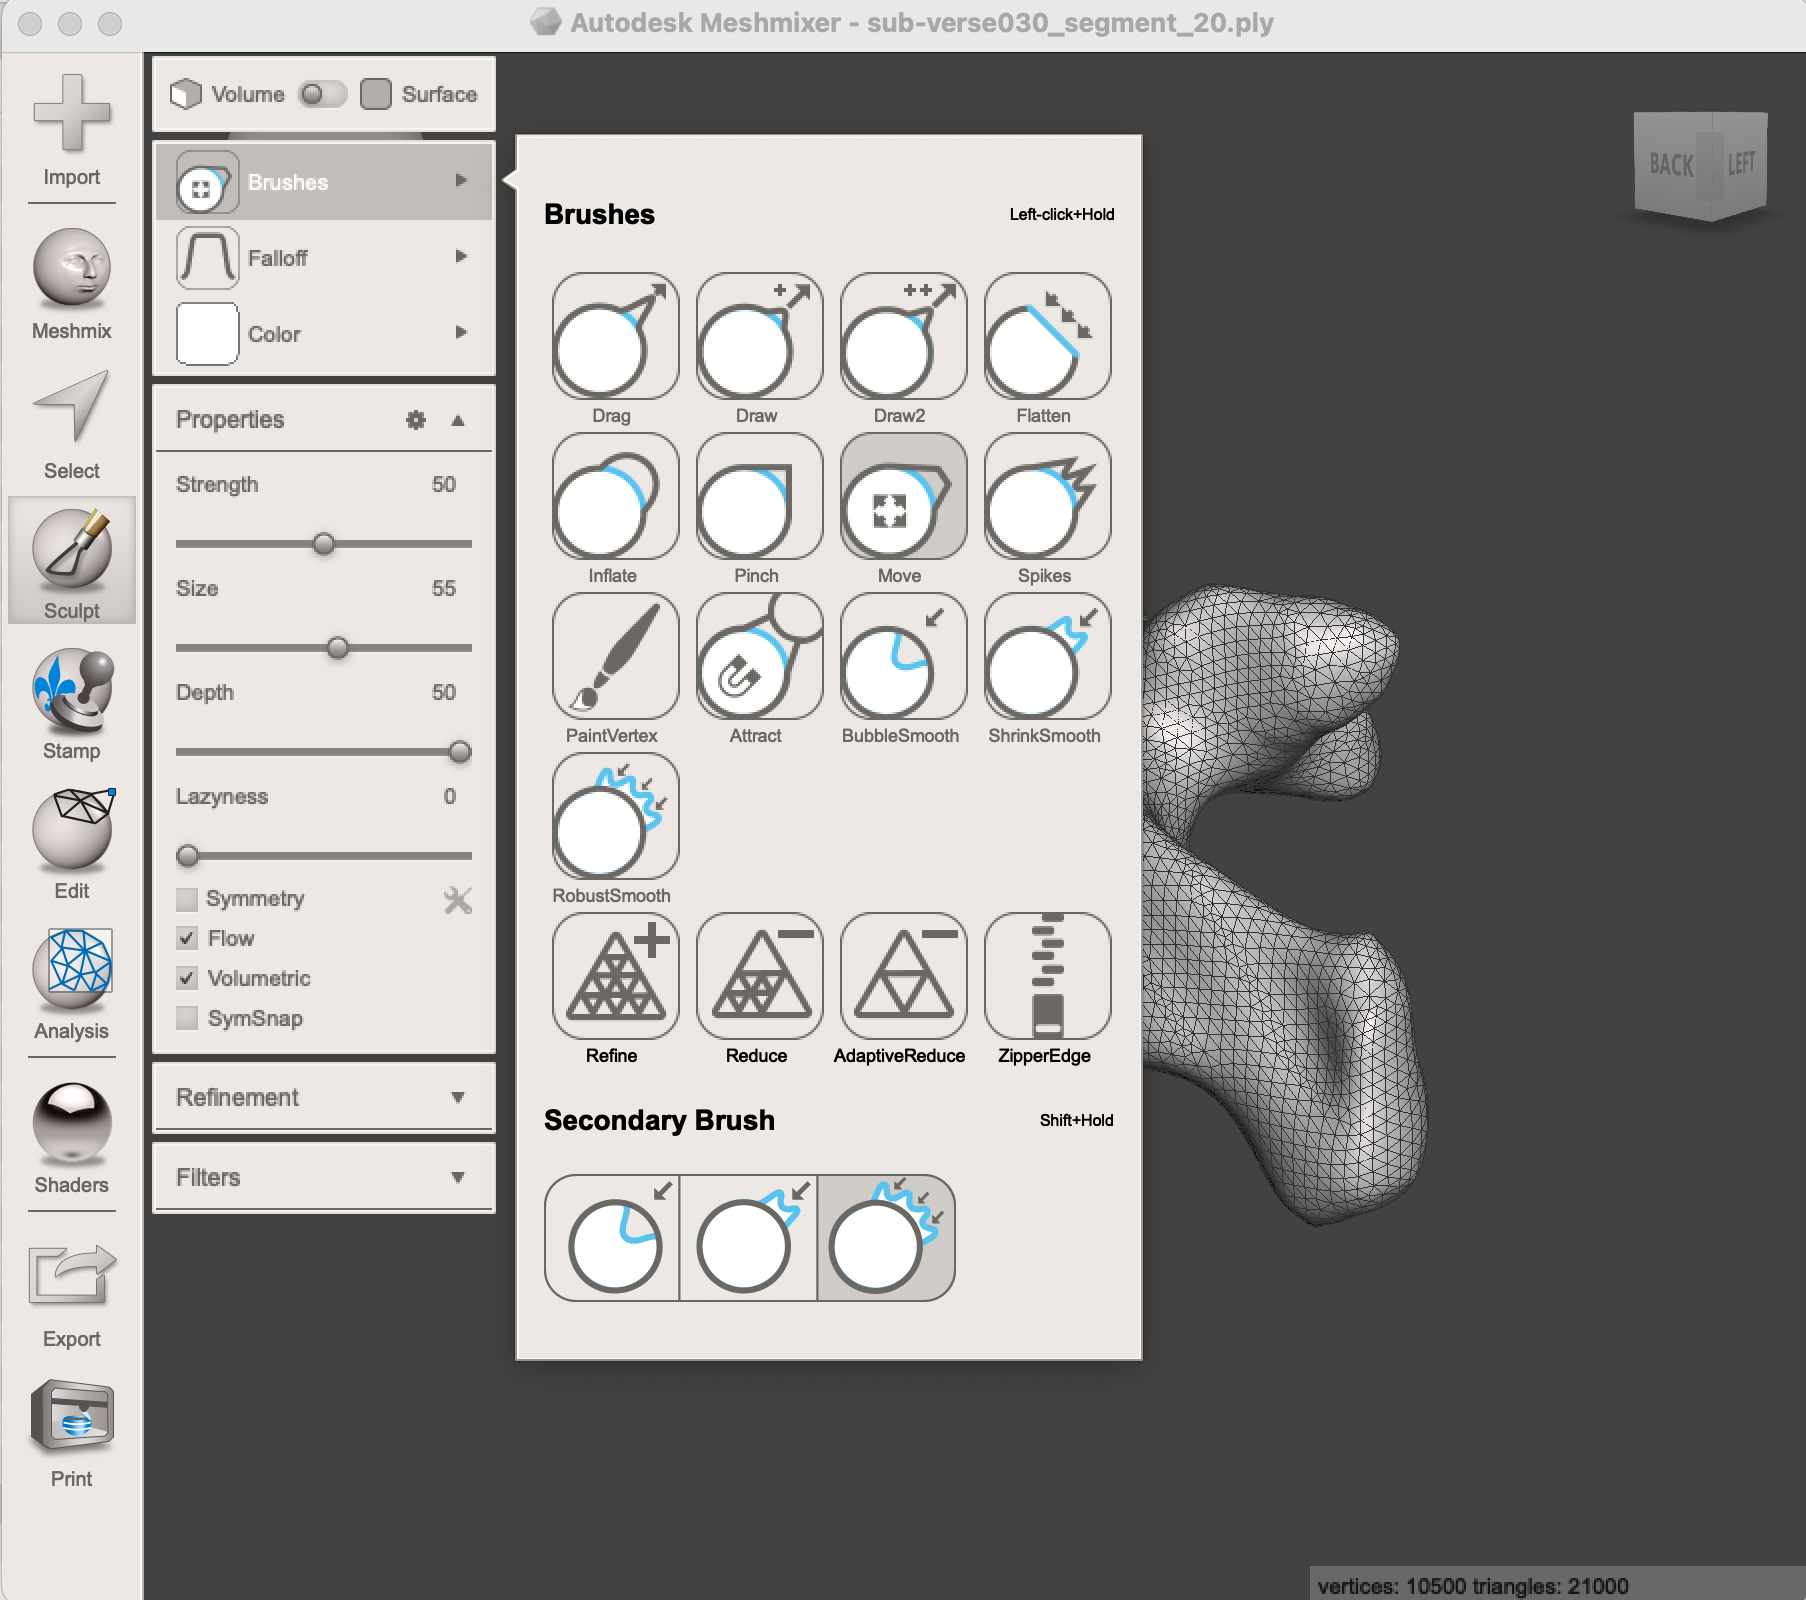
The goal here is to remove noise as well as all possible biases that the mesh might have. We can also manually increase the triangulation in some areas of the mesh and decrease it in others, again, depending on the use case of the model.
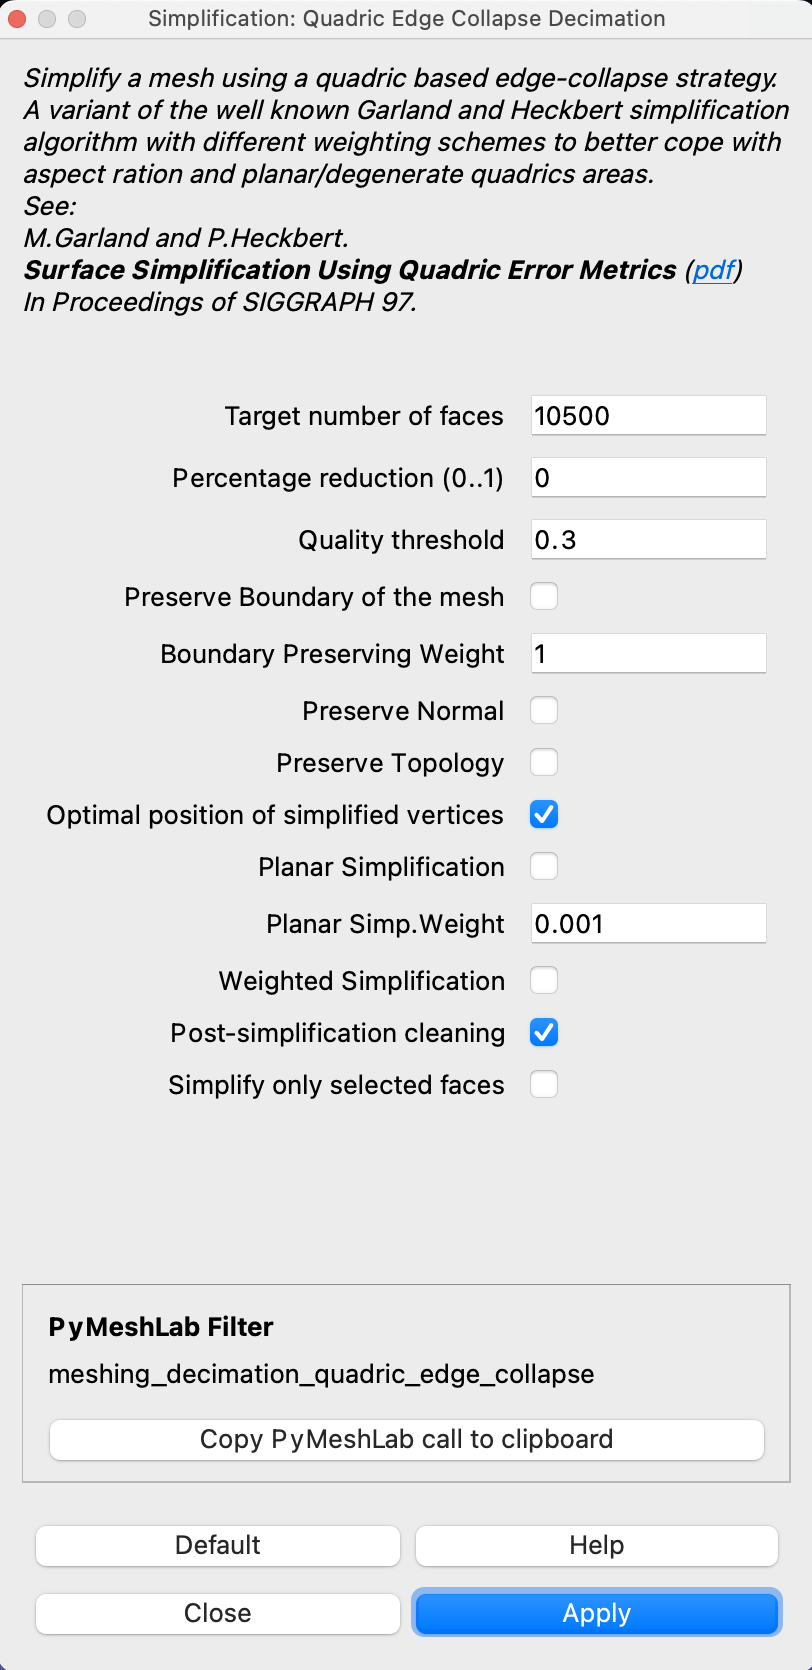
The last step I do is to decimate the mesh. You might want to avoid this step if you have already manually defined the coarseness of the mesh everywhere you want. Again, the amount of decimation completely depends on your usage of the model. The more the mesh is decimated, the fewer points it will have, thereby it will be faster to compute and take up less space. But it will also not look as good when rendering it.
Let’s try out different decimation levels in MeshLab and see what it looks like. I prefer the mesh output from quadratic edge decimation algorithm filters -> Remeshing, Simplification and Reconstruction -> Simplification: Quadratic Edge Collapse Decimation.
The same decimation algorithm is also available directly in Scalismo, so use it there you can simply load in the mesh, perform the decimation operation and save the mesh again. Like this, you can even have different coarseness levels of your reference mesh available
val mesh = MeshIO.readMesh(new File("mesh.ply")).get
val decimated = mesh.operations.decimate(1000)
MeshIO.writeMesh(decimated, new File("decimated.ply"))


That’s all there is to it. Some simple steps that will save you hours if not days of work down the line.
In the next tutorial I’ll show you:
- How to design kernels to deform the choosen reference mesh in order to use it for non-rigid registration.